.png)


How to Create a Pro On-Camera Setup for Any Budget
- Elyse Sevi

- Oct 17, 2025
- 3 min read
Look confident, sound clear, and stand out on screen - without overspending.

If you’ve ever hit “record” and thought, why don’t I look as polished as everyone else online?, you’re not alone. The truth is, a professional on-camera look isn’t about fancy studio gear - it’s about using the right tools the right way.
Whether you’re an attorney recording client videos, a realtor creating property tours, or a business owner showing up on social media, you can elevate your video presence - no matter your budget.
Let’s break down exactly how to build your on-camera setup step by step.
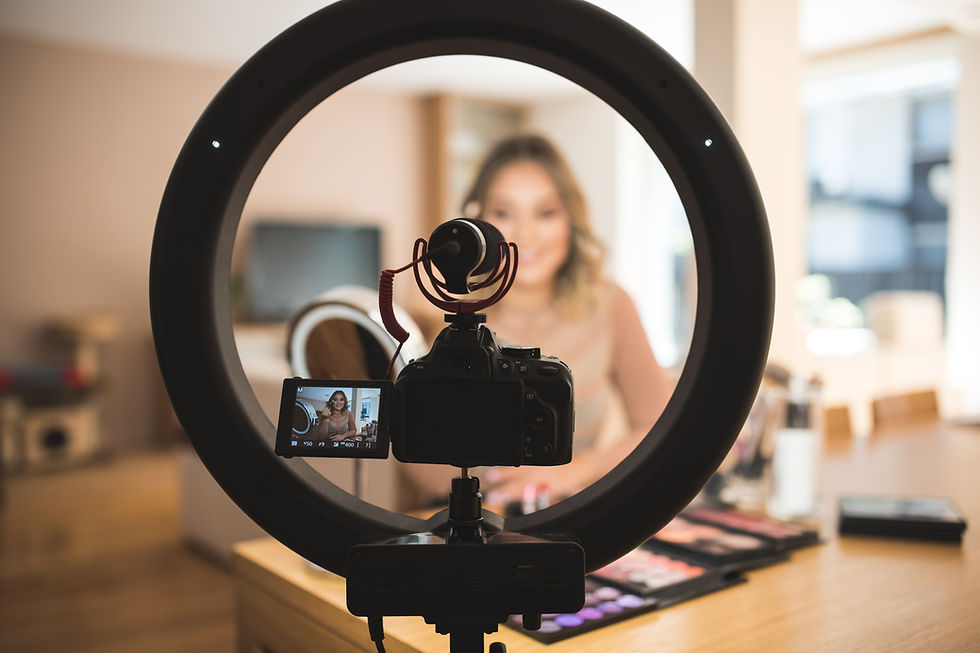
Step 1: Start with Lighting - It’s a Game Changer
Good lighting is the single biggest difference between looking “okay” and looking on-air ready.
If you’re on a budget, a simple ring light or clip-on LED panel can instantly brighten your face and soften shadows. Mid-range setups might include adjustable LED panels, while a high-end upgrade could be softbox lighting or a bi-color LED kit for full control.
Pro Tip: Position your light slightly above eye level and face it head-on for the most flattering, natural effect.
Step 2: Prioritize Sound - Viewers Forgive Bad Video, Not Bad Audio

Your message matters, but if people can’t hear you clearly, they’ll scroll right past.
Start small with a clip-on lavalier mic that plugs into your phone or laptop. If you’re creating weekly content or webinars, upgrade to a USB condenser mic or wireless lapel mic for crisp, studio-quality sound.
Pro Tip: Avoid recording near windows, fans, or vents — small noises get amplified on camera.
Step 3: Stabilize Your Shot - Say Goodbye to Wobbly Video
No one wants to watch a shaky frame. A simple tripod or phone stand instantly makes your setup look more professional.
If you’re filming often, look for tripods with adjustable height and a horizontal arm for versatile angles. And if you want to take it to the next level, try a camera mount or ring light stand combo for compact efficiency.
Step 4: Create a Background That Reflects Your Brand
Your background tells part of your story. It doesn’t have to be complicated — a clean wall, bookshelf, or branded backdrop can make your videos look intentional.
For higher production value, experiment with background lights or accent lighting to add warmth and depth.
Pro Tip: Remove clutter, keep your space bright, and let your personal style shine.
Step 5: Choose the Right Gear for Your Budget

The best part? You don’t have to guess what to buy. I’ve curated three On-Camera Essentials Kits based on experience - each one tested and trusted by me and my clients.
💼 On-Camera Basics: Affordable, durable gear for beginners
💡 Confident Creator Kit: Mid-range tools for reliable, elevated quality
✨ Premier Pro Presence Kit: Studio-level setup for professionals ready to shine
Each tier includes lighting, audio, and setup recommendations — everything you need to look confident on camera.
Final Thoughts: Confidence Starts Before You Hit Record
You don’t need thousands of dollars in equipment - you just need the right setup to let your confidence come through.
Once your lighting, sound, and space are ready, the rest is about how you show up and share your story. That’s where I come in.
If you want personalized feedback on your current setup, or help mastering your on-camera delivery, book a 1:1 On-Camera Coaching Session with me - and start showing up like the pro you already are.


Comments